
Your Custom Text Here
Inner Francophile: Spinach Quiche, Dorie Greenspan's Mustard Tart and The Yves St. Laurent Retrospective

When it was announced that the Yves Saint Laurent retrospective that wowed audiences at the Petit Palais in Paris two years ago would travel to Denver this week, and nowhere else in the United States, the question on many minds was: why Denver?
“America isn’t just New York or Los Angeles or Chicago or Boston,” said Pierre Bergé, Saint Laurent’s longtime partner in life and business and the head of the designer’s foundation. “Besides, Denver asked me. Voilà!” - New York Times, T Magazine, Blog
Looks like we moved out of Brooklyn and over to Denver at just the right time! I love museums-- permanent collections, special exhibits, retrospectives, Classical, Neo-Classical, the Classics, Abstract Expressionism, fashion, interiors and design, architecture...I love it all. So when I heard that the Denver Art Museum was the exclusive U.S. venue for the Yves St. Laurent retrospective, I was giddy with excitement. Positively giddy. G-I-D-D-Y.
 |
| The "Big Sweep" by Claes Oldenburg and Coosje van Bruggen, outside DAM. |

Feeling the spirit of YSL, I toyed with the idea of wearing a wool pants suit for my museum visit. But it was really warm that day so it didn't seem terribly practical to be donning wool. Well that, and I was heading over to the exhibit straight from the kid's playground. So there I was, at the museum's biggest fashion event, dressed rather unfashionably. But who cares, right? I was there! Yes, I was there, enjoying the exhibit, for over two hours, sans children.
There is no photography allowed inside the venue, so you will have to take my word on this-- the retrospective was wonderful. Magnificent, really. The presentation, curation and collection were impeccable. I may have to go back one more time...
Now it doesn't take much for me to get in touch with my inner Francophile, so in honor of Yves, I decided to make two quiches this week. And get this-- I made the dough too. Oh yes. Mais oui! I rolled out some pâte brisée, which literally means "short pastry." And I did it twice. Turns out that making tart dough isn't difficult at all, you just have to be mindful that it needs to chill for three hours before you can actually use it.
I decided to go with a spinach quiche (originally from Bon Appetit Magazine) and a mustard tart (from Dorie Greenspan's tome, Around My French Table). I followed Dorie's recipe for pâte brisée as well.
I decided to parbake both crusts for 20 minutes, with oiled foil on top (more on this below), and then let the pies bake an additional 2 minutes once the foil was removed. In retrospect, I should have let them bake a few minutes longer. I think the crust would have been a bit more flaky. That said, all in all, it was a very successful (first!) attempt at making homemade quiche.
So here they are. I hope you enjoy the recipes. And if you find yourself in Denver before July 8th, definitely visit the Denver Art Museum's retrospective on YSL.
I'm off to channel Catherine Deneuve...and hoping that Netflix delivers Belle De Jour lickety-split.
Au revoir!
Pâte Brisée/ Tart Dough (Courtesy of Dorie Greenspan, Around My French Table)
Yield: Makes one 9 - to 9 ½-inch tart shell
Be prepared: The dough should chill for at least 3 hours.
Ingredients
1 1/4 cups all-purpose flour
1 teaspoon sugar
1/2 teaspoon salt
6 tablespoons (3/4 stick) very cold (or frozen) unsalted butter, cut into bits
1 large egg
1 teaspoon ice water

 To make the dough by hand: Put the flour, sugar, and salt in a large bowl. Drop in the bits of butter and, using your hands or a pastry blender, work the butter into the flour until it is evenly distributed. You’ll have large and small butter bits, and that’s fine — uniformity isn’t a virtue here. Beat the egg and water together, drizzle over the dough, and, using a fork, toss the dough until it is evenly moistened. Reach into the bowl and, using your fingertips, mix and knead the dough until it comes together. Turn it out onto a work surface, gather it into a ball (if the dough doesn’t come together easily, push it, a few spoonfuls at a time, under the heel of your hand or knead it some more), and flatten it into a disk.

Chill the dough for at least 3 hours. (The dough can be refrigerated for up to 5 days.)
When you’re ready to make the tart shell, butter a 9- to 9 1/2-inch fluted tart pan with a removable bottom (butter it even if it’s nonstick).
To roll out the dough: I like to roll out the dough between sheets of wax paper or plastic wrap or in a lightly floured rolling cover, but you can roll it out on a lightly floured work surface. If you’re working between sheets of paper or plastic wrap, lift the paper or plastic often so that it doesn’t roll into the dough, and turn the dough over frequently. If you’re just rolling on the counter, make sure to lift and turn the dough and reflour the counter often. The rolled-out dough should be about ¼ inch thick and at least 12 inches in diameter.
Transfer the dough to the tart pan, easing it into the pan without stretching it. (What you stretch now will shrink in the oven later.) Press the dough against the bottom and up the sides of the pan. If you’d like to reinforce the sides of the crust, you can fold some of the excess dough over, so that you have a double thickness around the sides. Using the back of a table knife, trim the dough even with the top of the pan. Prick the base of the crust in several places with a fork.

Chill — or freeze — the dough for at least 1 hour before baking.
Center a rack in the oven and preheat the oven to 400 degrees. Press a piece of buttered foil (or use nonstick foil) against the crust’s surface. If you’d like, you can fill the covered crust with rice or dried beans (which will be inedible after this but can be used for baking for months to come) to keep the dough flat, but this isn’t really necessary if the crust is well chilled. Line a baking sheet with a silicone baking mat or parchment paper and put the tart pan on the sheet.

To partially bake the crust: Bake for 20 minutes, then very carefully remove the foil (with the rice or beans). Return the crust to the oven and bake for another 3 to 5 minutes, or until it is lightly golden. Transfer the baking sheet to a cooling rack and allow the crust to cool before you fill it.
To fully bake the crust: Bake for an additional 10 minutes, or until it is an even golden brown. Transfer the baking sheet to a cooling rack and allow the crust to cool before you fill it.
Storing: Well wrapped, the dough can be kept in the refrigerator for up to 5 days or frozen for up to 1 month. Although the fully baked crust can be wrapped airtight and frozen for up to 2 months, I prefer to freeze the unbaked crust in the pan and bake it directly from the freezer — it has a fresher flavor. Just add about 5 minutes or so to the baking time.


Ingredients
3 carrots (not too fat), trimmed and peeled
3 thin leeks, white and light green parts only, cut lengthwise in half and washed
2 rosemary sprigs
3 large eggs
6 tablespoons crème fraîche or heavy cream
2 tablespoons Dijon mustard, or to taste
2 tablespoons grainy mustard, preferably French, or to taste
Salt, preferably fleur de sel, and freshly ground white pepper
1 9- to 9½-inch tart shell made from Tart Dough (recipe above), partially baked and cooled
Method
Center a rack in the oven and preheat the oven to 425 degrees. Line a baking sheet with a silicone baking mat or parchment paper.


Yield: Makes one 9 - to 9 ½-inch tart shell
Be prepared: The dough should chill for at least 3 hours.
Ingredients
1 1/4 cups all-purpose flour
1 teaspoon sugar
1/2 teaspoon salt
6 tablespoons (3/4 stick) very cold (or frozen) unsalted butter, cut into bits
1 large egg
1 teaspoon ice water
Method
To make the dough in a food processor: Put the flour, sugar and salt in the processor and whir a few times to blend. Scatter the bits of butter over the flour and pulse several times, until the butter is coarsely mixed into the flour. Beat the egg with the ice water and pour it into the bowl in 3 small additions, whirring after each one. (Don’t overdo it — the dough shouldn’t form a ball or ride on the blade.) You’ll have a moist, malleable dough that will hold together when pinched. Turn the dough out onto a work surface, gather it into a ball (if the dough doesn’t come together easily, push it, a few spoonfuls at a time, under the heel of your hand or knead it lightly), and flatten it into a disk.
To make the dough in a food processor: Put the flour, sugar and salt in the processor and whir a few times to blend. Scatter the bits of butter over the flour and pulse several times, until the butter is coarsely mixed into the flour. Beat the egg with the ice water and pour it into the bowl in 3 small additions, whirring after each one. (Don’t overdo it — the dough shouldn’t form a ball or ride on the blade.) You’ll have a moist, malleable dough that will hold together when pinched. Turn the dough out onto a work surface, gather it into a ball (if the dough doesn’t come together easily, push it, a few spoonfuls at a time, under the heel of your hand or knead it lightly), and flatten it into a disk.
To make the dough by hand: Put the flour, sugar, and salt in a large bowl. Drop in the bits of butter and, using your hands or a pastry blender, work the butter into the flour until it is evenly distributed. You’ll have large and small butter bits, and that’s fine — uniformity isn’t a virtue here. Beat the egg and water together, drizzle over the dough, and, using a fork, toss the dough until it is evenly moistened. Reach into the bowl and, using your fingertips, mix and knead the dough until it comes together. Turn it out onto a work surface, gather it into a ball (if the dough doesn’t come together easily, push it, a few spoonfuls at a time, under the heel of your hand or knead it some more), and flatten it into a disk. Chill the dough for at least 3 hours. (The dough can be refrigerated for up to 5 days.)
When you’re ready to make the tart shell, butter a 9- to 9 1/2-inch fluted tart pan with a removable bottom (butter it even if it’s nonstick).
To roll out the dough: I like to roll out the dough between sheets of wax paper or plastic wrap or in a lightly floured rolling cover, but you can roll it out on a lightly floured work surface. If you’re working between sheets of paper or plastic wrap, lift the paper or plastic often so that it doesn’t roll into the dough, and turn the dough over frequently. If you’re just rolling on the counter, make sure to lift and turn the dough and reflour the counter often. The rolled-out dough should be about ¼ inch thick and at least 12 inches in diameter.
Transfer the dough to the tart pan, easing it into the pan without stretching it. (What you stretch now will shrink in the oven later.) Press the dough against the bottom and up the sides of the pan. If you’d like to reinforce the sides of the crust, you can fold some of the excess dough over, so that you have a double thickness around the sides. Using the back of a table knife, trim the dough even with the top of the pan. Prick the base of the crust in several places with a fork.
Chill — or freeze — the dough for at least 1 hour before baking.
Center a rack in the oven and preheat the oven to 400 degrees. Press a piece of buttered foil (or use nonstick foil) against the crust’s surface. If you’d like, you can fill the covered crust with rice or dried beans (which will be inedible after this but can be used for baking for months to come) to keep the dough flat, but this isn’t really necessary if the crust is well chilled. Line a baking sheet with a silicone baking mat or parchment paper and put the tart pan on the sheet.
To partially bake the crust: Bake for 20 minutes, then very carefully remove the foil (with the rice or beans). Return the crust to the oven and bake for another 3 to 5 minutes, or until it is lightly golden. Transfer the baking sheet to a cooling rack and allow the crust to cool before you fill it.
To fully bake the crust: Bake for an additional 10 minutes, or until it is an even golden brown. Transfer the baking sheet to a cooling rack and allow the crust to cool before you fill it.
Storing: Well wrapped, the dough can be kept in the refrigerator for up to 5 days or frozen for up to 1 month. Although the fully baked crust can be wrapped airtight and frozen for up to 2 months, I prefer to freeze the unbaked crust in the pan and bake it directly from the freezer — it has a fresher flavor. Just add about 5 minutes or so to the baking time.
* * *
Gérard’s Mustard Tart (Courtesy of Dorie Greenspan, Printed in The New York Times, Diner's Journal)
Be sure to use strong mustard from Dijon. Dorie's friend Gérard Jeannin uses Dijon’s two most popular mustards in his tart: smooth, known around the world as Dijon, and grainy or old-fashioned, known in France as “à l’ancienne.” You can use either one or the other, or you can adjust the proportions to match your taste, but whatever you do, make sure your mustard is fresh, bright colored, and powerfully fragrant. Do what Gérard would do: smell it first. If it just about brings tears to your eyes, it’s fresh enough for this tart.Ingredients
3 carrots (not too fat), trimmed and peeled
3 thin leeks, white and light green parts only, cut lengthwise in half and washed
2 rosemary sprigs
3 large eggs
6 tablespoons crème fraîche or heavy cream
2 tablespoons Dijon mustard, or to taste
2 tablespoons grainy mustard, preferably French, or to taste
Salt, preferably fleur de sel, and freshly ground white pepper
1 9- to 9½-inch tart shell made from Tart Dough (recipe above), partially baked and cooled
Method
Center a rack in the oven and preheat the oven to 425 degrees. Line a baking sheet with a silicone baking mat or parchment paper.
Cut the carrots and leeks into slender bâtons or sticks: First cut the carrots lengthwise in half, then place the halves cut side down on the cutting board and cut crosswise in half or cut into chunks about 3 inches long. Cut the pieces into 1/ 8- to 1/4-inch-thick matchsticks. If your carrots were fat and you think your matchsticks don’t look svelte enough, cut them lengthwise in half. Cut the leeks in the same way.
Fit a steamer basket into a saucepan. Pour in enough water to come almost up to the steamer, cover, and bring to a boil. Drop the carrots, leeks, and 1 rosemary sprig into the basket, cover, and steam until the vegetables are tender enough to be pierced easily with the tip of a knife, 10 to 15 minutes. Drain the vegetables and pat them dry; discard the rosemary sprig.
In a medium bowl, whisk the eggs together with the crème fraîche or heavy cream. Add the mustards, season with salt and white pepper — mustard has a tendency to be salty, so proceed accordingly — and whisk to blend. Taste and see if you want to add a little more of one or the other mustards.
Put the tart pan on the lined baking sheet and pour the filling into the crust. Arrange the vegetables over the filling — they can go in any which way, but they’re attractive arranged in spokes coming out from the center of the tart. Top with the remaining rosemary sprig and give the vegetables a sprinkling of salt and a couple of turns of the pepper mill.
Bake the tart for about 30 minutes, or until it is uniformly puffed and lightly browned here and there and a knife inserted into the center of the custard comes out clean. Transfer the tart to a cooling rack and let it rest for 5 minutes before removing the sides of the pan.
Serve hot, warm, or at room temperature (or lightly chilled).
Serving: The tart is delicious just out of the oven, warm, at room temperature, or even slightly chilled — although that wouldn’t be Gérard’s preference, I’m sure. If you’re serving it as a starter, cut it into 6 portions; if it’s the main event, serve it with a lightly dressed small salad.
Storing: Like all tarts, this is best soon after it is made, but leftovers can be covered, chilled, and nibbled on the next day.
* * *
Spinach Quiche (Courtesy of Bon Appetit Magazine and Smitten Kitchen, with a modification or two...)
Ingredients
4 ounces of cream cheese, room temperature
4 ounces of cream cheese, room temperature
1/2 cup half and half (or milk)
3 eggs
1 10-ounce package frozen chopped spinach, thawed and drained
1/2 cup grated cheddar (you could use Gruyere too)
1/4 cup grated Parmesan
3 green onions, thinly sliced
1/4 teaspoon salt
1/4 teaspoon pepper
Preheat oven to 425°. Beat cream cheese in medium bowl until smooth. Gradually beat in half and half and eggs. Mix in remaining ingredients. Pour mixture into prepared crust. Bake until crust is golden brown and filling is set, about 25 minutes. Cool 10 minutes before serving.
Preheat oven to 425°. Beat cream cheese in medium bowl until smooth. Gradually beat in half and half and eggs. Mix in remaining ingredients. Pour mixture into prepared crust. Bake until crust is golden brown and filling is set, about 25 minutes. Cool 10 minutes before serving.

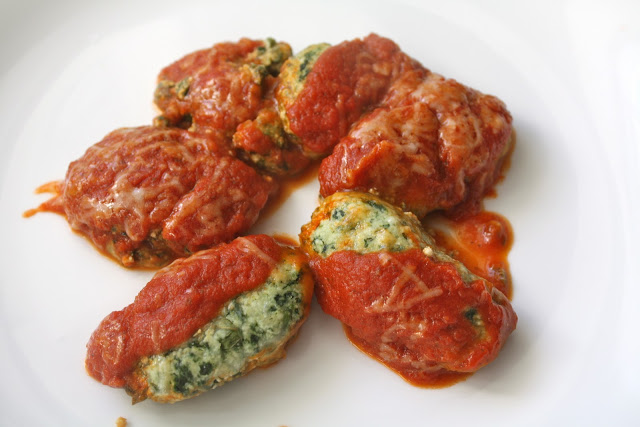
Dorie's Strozzapreti: Corsican Spinach and Mint Gnocchi
In Italian, 'Strozzapreti' translates to "priest
choker" or "priest strangler," but in a culinary context they
are typically an elongated form of cavatelli (or fusilli). In Corsica, and
throughout the Tuscan and Umbria regions of Italy, Strozzapreti can also
refer to a baked cheese and vegetable dish, or gnocchi. It has been said that
these gnocchi are large enough to choke a person (read: priest) if eaten whole,
hence the name "priest choker." I hope that doesn't render these
dumplings unappetizing!
This is another recipe from Dorie Greenspan's, Around My French
Table. (Have I mentioned how much I love this cookbook?) It's very
much Italian in terms of influence, but since this is a Corsican dish, and
Corsica is part of France, it's included in Greenspan's tome on French cuisine.
It's a bit time consuming to make (some of that is wait time though), but it's
worth it and you can divide the work up into parts. I made the gnocchi ahead of
time and chilled them in the refrigerator overnight. The next day I boiled and
baked them.
I love these little dumplings. The mint really makes these
gnocchi pop and it gives them a wonderful freshness. They remind me of
the spinach gnocchi
I made about a year ago, but those were topped with an asiago cream sauce and
these are smothered in homemade tomato sauce.
Heeding the caveat implied in the
dish's name (Strozzapreti), I cut mine in half.
So, go ahead, enjoy
these gnocchi…just be sure not to swallow them whole!


Use fresh ricotta and fresh mint...it
really makes the dish.
Strorzzapretis: Corsican Spinach and Mint
Gnocchi
(Courtesy of Dorie Greenspan,
Around My French Table)
Serves 6 starter servings or 4 main-course
servings
Ingredients
10 ounces spinach, trimmed
1 pound whole-milk ricotta or fresh brocciu, if you can
get it
1 large egg
5 ounces cheese, such as Gruyere or Emmenthal or a combination
of Gruyere and Parmesan, grated (about 1 1/4 cup)
1 bunch mint leaves, finely chopped (about 1 cup)
2 tablespoons all-purpose flour, plus more for shaping
Salt and freshly ground pepper
Olive oil
1 1/2 cups tomato sauce (I made my own but you can use a
good-quality store bought marinara as well)
Preparation
Wash the spinach in several changes of cool water, toss into a
large pot, with the water still clinging to the leaves. Place the pot over
medium-low heat, cover and cook the spinach, turning often, until it is soft,
about 5 minutes. Turn the spinach into a colander and shake out as much of the
water as possible.
When the spinach is cool enough to handle, press out the
remainder of the water (or as much as you can) by squeezing small bunches of
the spinach between your palms or by twisting them in a kitchen towel. Coarsely
chop the spinach, toss it into a bowl, and use your fingers to pull the clumps
of spinach apart as best you can.
With a sturdy rubber spatula or wooden spoon, beat the ricotta
or brocciu into the spinach, followed by an egg. Stir in half of the
grated cheese and the mint, sprinkle over the flour, season with salt and
pepper and blend. You'll have a soft, malleable mixture.
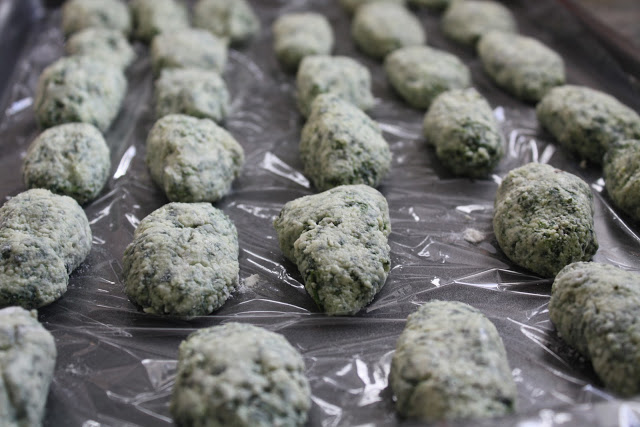
Line a baking sheet or tray that will fit in the fridge with
plastic wrap. Make a mound of about 1/4 cup flour on your work surface.
Working with two tablespoons, scoop up a tablespoonful of the
cheese mixture with one spoon and then scrape the mix from one spoon to the
other until you've formed a cohesive quenelle. Drop the quenelle into the mound
of flour, and then toss it gently from hand to hand to shake off the excess.
After working the mixture this way, your quenelle will probably look like
a large, slightly misshapen bullet, and that's just fine. Put the nugget on the
lined sheet and continue until you've used all the dough, you'll have about 3
dozen strozzapreti.
Chill or freeze the strozzapreti for about 30 minutes, just to
firm them a bit. (I refrigerated them overnight).
Center a rack in the oven and preheat the oven to 425 degrees F.
Lightly oil an 9x13 baking dish (glass, porcelain or pottery).
Bring a large pot of salted water to a boil, and have a big bowl
of ice and cold water nearby.
Remove the strozzapretis from the refrigerator or freezer. Lower
the heat under the pot so that the water is at a simmer, and carefully drop
some strozzapreti into the pot-- don't crowd the pot-- work in batches of 8 to
10 at a time. The nuggets will sink to the bottom of the pot and then pop to
the top. After they do, let them gently bob around in the pot for about 5
minutes, then lift them out of the simmering water with a slotted spoon and
drop them into the ice water.
Continue poaching and cooling the rest.
Drain the strozzapreti, and dry between sheets of paper towels--
be careful, they're soft and fragile-- then arrange them in the oiled pan. Pour
the tomato sauce over the strozzapreti, top with the remaining grated cheese,
and slide the pan into the oven.
Bake for about 15 minutes, until the sauce is bubbling hot, the
cheese melted and the strozzapreti heated through. Serve immediately.

"Harlem of the West" and some Gougeres (French Cheese Puffs)

Happy 2012! We had great New Year's weekend and I hope you did too. Our final weekend of 2011 started off with a little gathering at our house. We ate Indian (sub-continent, not Native-American) and it was good! I made Julie Sahni's Dum Aloo- whole potatoes with spicy yogurt gravy- and our friend Teo made Chana Masala, which was excellent. The next day we went to a NYE party- with the kids- and had a lovely time. The hosts of the party hired two babysitters, so the kids were all being supervised downstairs in the basement while the adults hung out upstairs. Brilliant.
I brought over French cheese puffs, or Gougère, which I'm pretty sure I mispronounced the whole night, despite studying French in high school. The gougère (pronounced: goo/zhehr) were delicious. I decided to make Dorie Greenspan's, but the recipes from David Lebovitz and Martha Stewart looked great too. They were puffed, airy, light and cheesy. I decided to use a mix of Gruyere and White Cheddar. It was the way to go. Gougère are the perfect compliment to a glass of champagne.

The next day I woke up early. I decided it was a good day to take the kids on an historic walking tour. Most of the shops and restaurants were closed, and almost no one was milling about on the streets, but the sun was shining and there was architecture to see.
We ventured over to the 'Five Points' section of the city. It's about a mile away from downtown and is named 'Five Points' due to the transit stop that culminates at the point where Washington Street, 27th Street, 26th Avenue, and Welton Street all meet (the intersection is five-ways). This area is also affectionately called "Harlem of the West."
Five Points is one of the oldest sections of the city and the first predominantly African-American neighborhood in Denver. It was well known for its Jazz history and Duke Ellington, Billie Holiday and Miles Davis (to name a few) all passed through. There's some great architecture in this part of town as well. There are buildings from the 1880's and 90's, 1910-1920 (like the Rossonian) and some great Queen Anne-style mansions. Of course there are some modern add-ons too.


* * *

Back to the puffs: They are the perfect thing to make for a special occasion, a little soirée or just any day...
I love these little gougeres!
Ingredients
1/2 cup whole milk
1/2 cup water
8 tablespoons (1 stick) unsalted butter, cut into 4 pieces
1/2 teaspoon salt
1 cup all-purpose flour
5 large eggs, at room temperature
1 1/2 cups coarsely grated cheese, such as Gruyère or cheddar, or a mix (about 6 ounces)
Preparation
Position the racks to divide the oven into thirds and preheat the oven to 425 degrees F. Line two baking sheets with silicone baking mats or parchment paper.

Bring the milk, water, butter, and salt to a rapid boil in a heavy-bottomed medium saucepan over high heat. Add the flour all at once, lower the heat to medium-low, and immediately start stirring energetically with a wooden spoon or heavy whisk. The dough will come together and a light crust will form on the bottom of the pan. Keep stirring—with vigor—for another minute or two to dry the dough. The dough should now be very smooth.

Turn the dough into the bowl of a mixer fitted with the paddle attachment or into a bowl that you can use for mixing with a hand mixer or a wooden spoon and elbow grease. Let the dough sit for a minute, then add the eggs one by one and beat, beat, beat until the dough is thick and shiny.

Make sure that each egg is completely incorporated before you add the next, and don't be concerned if the dough separates—by the time the last egg goes in, the dough will come together again. Beat in the grated cheese.

Once the dough is made, it should be spooned out immediately.

Using about 1 tablespoon of dough for each gougère , drop the dough from a spoon onto the lined baking sheets, leaving about 2 inches of puff space between the mounds. Using about 1 tablespoon of dough for each gougère, drop the dough from a spoon onto the lined baking sheets, leaving about 2 inches of puff space between the mounds.

Slide the baking sheets into the oven and immediately turn the oven temperature down to 375 degrees F. Bake for 12 minutes, then rotate the pans from front to back and top to bottom. Continue baking until the gougères are golden, firm, and, yes, puffed, another 12 to 15 minutes or so. Serve warm, or transfer the pans to racks to cool.
Serving
Gougères are good straight from the oven and at room temperature. I like them both ways, but I think you can appreciate them best when they're still warm. Serve with kir, white wine, or Champagne.
Storing
The best way to store gougères is to shape the dough, freeze the mounds on a baking sheet, and then, when they're solid, lift them off the sheet and pack them airtight in plastic bags. Bake them straight from the freezer—no need to defrost—just give them a minute or two more in the oven. Leftover puffs can be kept at room temperature over night and reheated in a 350-degree-F oven, or they can be frozen and reheated before serving.

1/2 cup water
8 tablespoons (1 stick) unsalted butter, cut into 4 pieces
1/2 teaspoon salt
1 cup all-purpose flour
5 large eggs, at room temperature
1 1/2 cups coarsely grated cheese, such as Gruyère or cheddar, or a mix (about 6 ounces)
Preparation
Position the racks to divide the oven into thirds and preheat the oven to 425 degrees F. Line two baking sheets with silicone baking mats or parchment paper.
Bring the milk, water, butter, and salt to a rapid boil in a heavy-bottomed medium saucepan over high heat. Add the flour all at once, lower the heat to medium-low, and immediately start stirring energetically with a wooden spoon or heavy whisk. The dough will come together and a light crust will form on the bottom of the pan. Keep stirring—with vigor—for another minute or two to dry the dough. The dough should now be very smooth.
Turn the dough into the bowl of a mixer fitted with the paddle attachment or into a bowl that you can use for mixing with a hand mixer or a wooden spoon and elbow grease. Let the dough sit for a minute, then add the eggs one by one and beat, beat, beat until the dough is thick and shiny.
Make sure that each egg is completely incorporated before you add the next, and don't be concerned if the dough separates—by the time the last egg goes in, the dough will come together again. Beat in the grated cheese.
Once the dough is made, it should be spooned out immediately.
Using about 1 tablespoon of dough for each gougère , drop the dough from a spoon onto the lined baking sheets, leaving about 2 inches of puff space between the mounds. Using about 1 tablespoon of dough for each gougère, drop the dough from a spoon onto the lined baking sheets, leaving about 2 inches of puff space between the mounds.
Slide the baking sheets into the oven and immediately turn the oven temperature down to 375 degrees F. Bake for 12 minutes, then rotate the pans from front to back and top to bottom. Continue baking until the gougères are golden, firm, and, yes, puffed, another 12 to 15 minutes or so. Serve warm, or transfer the pans to racks to cool.
Serving
Gougères are good straight from the oven and at room temperature. I like them both ways, but I think you can appreciate them best when they're still warm. Serve with kir, white wine, or Champagne.
Storing
The best way to store gougères is to shape the dough, freeze the mounds on a baking sheet, and then, when they're solid, lift them off the sheet and pack them airtight in plastic bags. Bake them straight from the freezer—no need to defrost—just give them a minute or two more in the oven. Leftover puffs can be kept at room temperature over night and reheated in a 350-degree-F oven, or they can be frozen and reheated before serving.
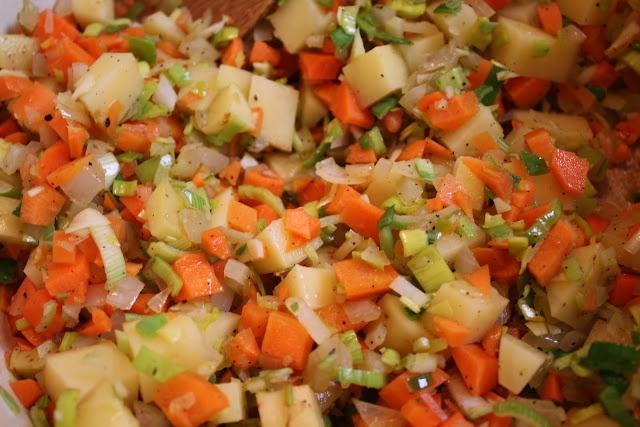
Barefoot in Paris: Ina's Provencal Vegetable Soup Au Pistou
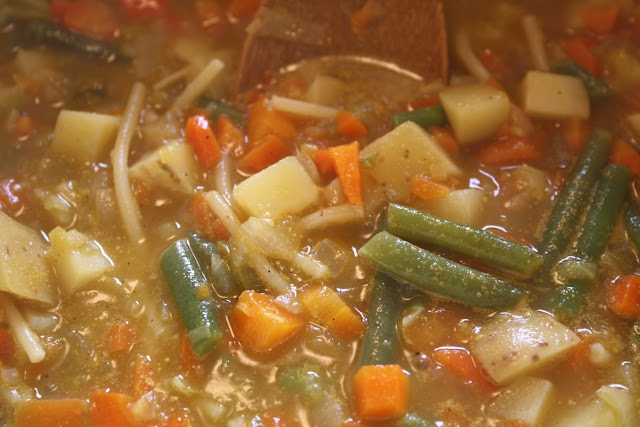
I made this for lunch today and I was unable to limit myself to just one bowl. Oh yes, I went in for doubles. It's that kind of wonderful.
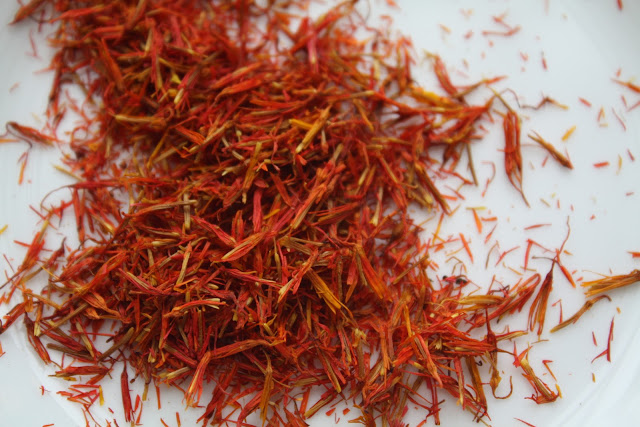
In addition to the great flavor, I have most of the ingredients in my pantry or fridge: onions, olive oil, leeks, potatoes, carrots, salt, pepper, broth, spaghetti and parmesan. And I happen to have saffron threads on hand thanks to my husband's aunt who just returned from a trip to the Middle-East and came back with spice gifts for me.
Hope you enjoy the soup as much as I did...
Hope you enjoy the soup as much as I did...

Ingredients
- 2 tablespoons good olive oil
- 2 cups chopped onions (2 onions)
- 2 cups chopped leeks, white and light green parts (2 to 4 leeks)
- 3 cups 1/2-inch-diced unpeeled boiling potatoes(1 pound)
- 3 cups 1/2-inch-diced carrots (1 pound)
- 1 1/2 tablespoons kosher salt
- 1 teaspoon freshly ground black pepper
- 3 quarts homemade chicken stock or canned broth (I use vegetable stock)I sometimes substitute part of the broth with water.
- 1 teaspoon saffron threads
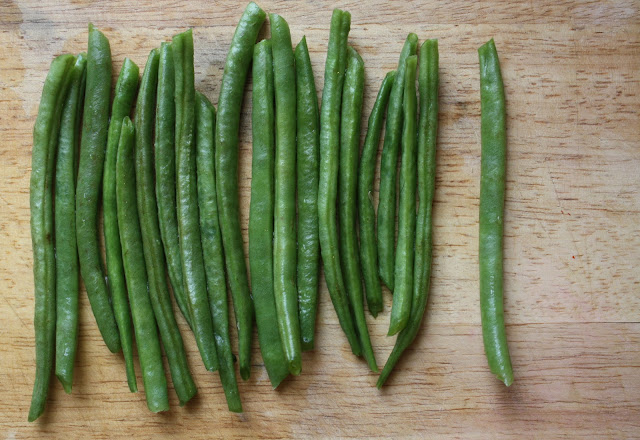
- 1/2 pound haricots verts, ends removed and cut in 1/2 (I went in 1/3 for smaller pieces)
- 4 ounces spaghetti, broken in pieces
- 1 cup Pistou, recipe follows
- Freshly grated Parmesan, for serving
Directions
Heat the olive oil in a large stockpot, add the onions, and saute over low heat for 10 minutes, or until the onions are translucent. Add the leeks, potatoes, carrots, salt, and pepper and saute over medium heat for another 5 minutes. Add the chicken stock and saffron, bring to a boil, then simmer uncovered for 30 minutes, or until all the vegetables are tender. Add the haricots verts and spaghetti, bring to a simmer, and cook for 15 more minutes.
To serve, whisk 1/4 cup of the pistou into the hot soup, then season to taste. Depending on the saltiness of your chicken stock, you may need to add up to another tablespoon of salt. Serve with grated Parmesan cheese and more pistou.
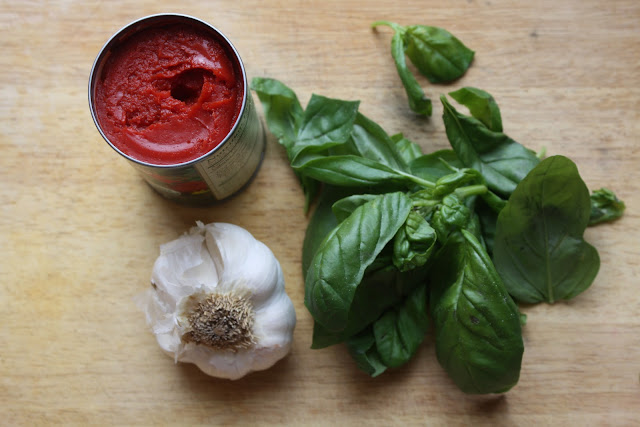

Pistou:
1/4 cup tomato paste
24 large basil leaves
1/2 cup freshly grated Parmesan
1/2 cup good olive oil
Place the garlic, tomato paste, basil, and Parmesan in the bowl of a food processor and puree. With the motor running, slowly pour the olive oil down the feed tube to make a paste. Pack into a container, pour a film of olive oil on top, and close the lid.
Yield: 1 cup

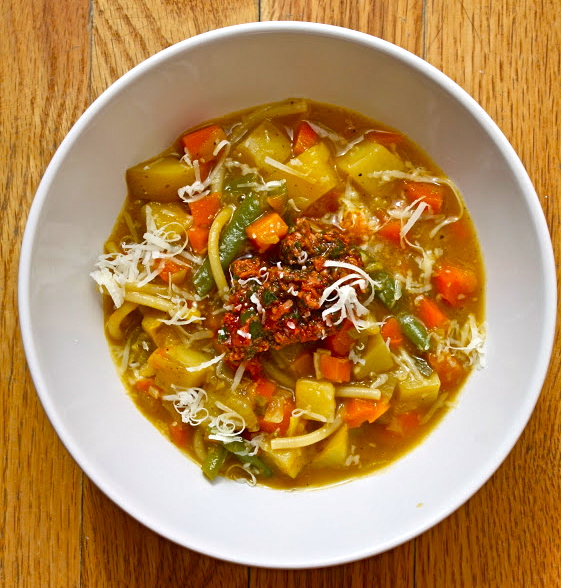
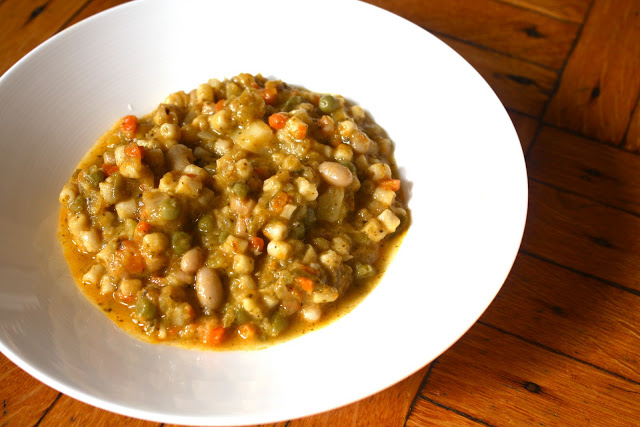
Hipstamatic Wave Hill and My World's Famous Pesto Minestrone
This past week I took Otis up to see my parents, his grandparents. Since they live in Riverdale that meant I had to make a little pilgrimage to my favorite NYC destination -- Wave Hill(featured in this previous post). It was windy and a bit chilly, but the leaves were still magnificent-- tons of golden and red hues. Though some of the trees were already bare, there were enough that still had turning leaves. And the views across the Hudson River were breathtaking. I picked up an absolutely delicious salad at the cafe-- a spinach, pumpkin and blue cheese salad-- but I wished that I had packed up some of my pesto minestrone soup and made a picnic with some French bread. But alas, my soup was all sealed up in a Ball jar and sitting in Brooklyn...


This adaptation is based on a recipe I found in "Vegetarian Cooking" -- a tome/bible I picked up about 12 years ago when I moved to New Orleans. I've tweaked this recipe a smidge by adding my own pesto and adjusting a few proportions. I think this is the gold standard of minestrones! I like to use fresh pesto if I have it, but you can easily use store bought pesto. I like to make this in the early evening so that the whole house smells incredible. You can eat it immediately, but I like to let the finished product cool in a dutch oven and then put it in the fridge for one day before serving-- all the herbs, vegetables, legumes and broth meld together after 24 hours. Delish!
If the soup becomes too thick, you can use some stock or water to thin it out a bit. Then remember to season accordingly. Enjoy this soup-- it will instantly become one of your classic "go to" mains. I hope you like this minestrone as much as we do...
 |
| Carrots from our penultimate CSA pick-up. They got thrown right into the minestrone! |
(Adapted from Vegetarian Cooking by Linda Fraser)
Serves 6-8
Minestrone is a thick mixed vegetable soup that usually has short cut pasta or rice added to it. This one includes a home-made pesto sauce.
Ingredients
4 tablespoons of olive oil
1 large onion, finely chopped
1 leek, sliced
2-3 carrots, finely chopped
1 stalk of celery
2 cloves of garlic, finely chopped
2 potatoes, peeled and cut into small uniform dice, about 1/4 of an inch
6 cups of vegetable sock (you can use water, but stock gives the soup more flavor)
2 bay leaves
1/4 teaspoon of dried thyme
3/4 - 1 cup of tubetini, small shells or elbow noodles
3/4 of a cup of frozen peas
2 zucchini, finely chopped
15 ounce can of white beans, such as Cannellini or Great Northern Beans (For this recipe I use BPA-free canned beans. You can also use dry beans-- soaked overnight and cooked.)
1/2 tablespoon of salt (more to taste)
freshly ground black pepper, to taste
3 tablespoons of pesto (I like to use fresh, but you can use store bought as well.) Recipe follows.

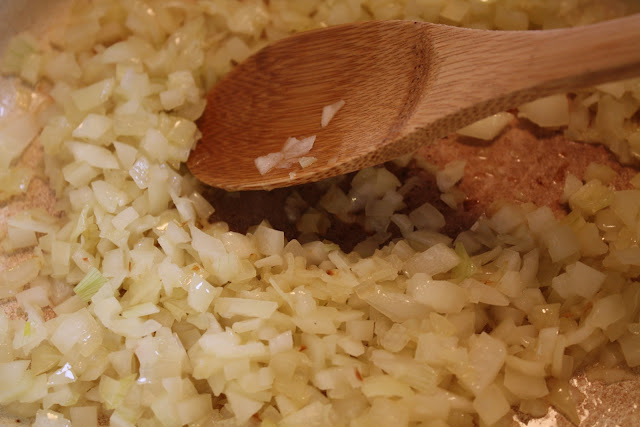
Heat the oil in a saucepan. Stir in the onions and leeks and cook for 5-6 minutes. Add the carrots, celery and garlic,and cook over moderate heat for 5 minutes. Add the potatoes and cook for 2-3 minutes more.
Pour in the stock and stir well. Add the herbs and season with salt and pepper. Add small pasta. Bring to a boil, reduce heat and cook for 10-12 minutes.
Stir in the peas, if fresh, and the zucchini. Simmer for 5 minutes. Add the frozen peas, if using. Cover the pot and simmer for 1o minutes.
Stir in beans (without liquid if using canned) and simmer for 10 minutes. Stir in the pesto sauce. Simmer for another 5 minutes. Remove from the heat. Enjoy!
This minestrone tastes even better the next day so you can make it in advance. Garnish with fresh grated parmesan.

Basic Pesto Sauce (An amalgamation from a bunch of different sources)
- 1/4 cup walnuts
- 1/4 cup pignoli (pine nuts)
- 2 cloves garlic-- more if you like it garlicky.
- 3 cups fresh basil leaves, packed
- 1 teaspoon kosher salt
- 1/2 teaspoon freshly ground black pepper
- 3/4 good olive oil
- 1/2 cup freshly grated Parmesan
Place the walnuts, pignoli, and garlic in the bowl of a food processor fitted with a steel blade. Process for 15 seconds. Add the basil leaves, salt, and pepper. With the processor running, slowly pour the olive oil into the bowl through the feed tube and process until the pesto is thoroughly pureed. Add the Parmesan and puree for a minute. Use right away or store the pesto in the refrigerator or freezer with a thin film of olive oil on top.
Caring for Pesto: Air is the enemy of pesto. Pack it with a film of oil or plastic wrap directly on top with the air pressed out.
Yield: 4 cups


I enjoy traveling, photography, hiking, street art, design, architecture, food trucks, gardening, the cosmos, cooking with the seasons, political activism and wallpaper! I know my interests span a variety of categories, here's where they all come together.

